Hello Friends,
Today , I am going to share the Paypal
integration steps in your
android application.

(1) create account in sandbox
environment:
Go to this link-
Here
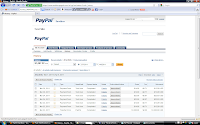
In website go to test account tab and
create your desired account
here three types
of account is available
(1)Personal [For individuals who shop
online]
(2)Business [For merchants who use a company or
group name]
(3)Premier [For individuals who buy and
sell on-line ]
create one
personal and one Business account for testing
transaction
for personal
account id is something like
this ==>>
mukesh_1300948766_per@gmail.com
for business
account id is something
like this
==>> mukesh_1300937866_biz@gmail.com
Where '_per'
means personal account and '_biz' means business
account
Now i hope you
have created two account ....lets move to second Step
(2) download paypal library for android and
add it to project
you can
download paypal library from
here
(3) test the below code with some
modification
package com.paypal.android.simpledemo;

import java.math.BigDecimal;

import android.app.Activity;
import android.content.Intent;
import android.graphics.Color;
import android.os.Bundle;
import android.os.Handler;
import android.os.Message;
import android.view.Gravity;
import android.view.View;
import android.view.View.OnClickListener;
import android.widget.Button;
import android.widget.EditText;
import android.widget.LinearLayout;
import android.widget.ScrollView;
import android.widget.TextView;
import android.widget.FrameLayout.LayoutParams;

import com.paypal.android.MEP.CheckoutButton;
import com.paypal.android.MEP.PayPal;
import com.paypal.android.MEP.PayPalAdvancedPayment;
import com.paypal.android.MEP.PayPalInvoiceData;
import com.paypal.android.MEP.PayPalInvoiceItem;
import com.paypal.android.MEP.PayPalPayment;
import com.paypal.android.MEP.PayPalPreapproval;
import com.paypal.android.MEP.PayPalReceiverDetails;

public class SimpleDemo extends Activity implements OnClickListener {

 // The PayPal server to be used - can also be ENV_NONE and ENV_LIVE
 private static final int server = PayPal.ENV_SANDBOX;
 // The ID of your application that you received from PayPal
 private static final String appID = "APP-80W284485P519543T";
 // This is passed in for the startActivityForResult() android function, the value used is up to you
 private static final int request = 1;

 public static final String build = "10.12.09.8053";

 protected static final int INITIALIZE_SUCCESS = 0;
 protected static final int INITIALIZE_FAILURE = 1;

 // Native android items for the application
 ScrollView scroller;
 TextView labelSimplePayment;
 TextView labelParallelPayment;
 TextView labelChainedPayment;
 TextView labelPreapproval;
 TextView labelKey;
 TextView appVersion;
 EditText enterPreapprovalKey;
 Button exitApp;
 TextView title;
 TextView info;
 TextView extra;
 LinearLayout layoutSimplePayment;
 LinearLayout layoutSplitPayment;
 LinearLayout layoutChainedPayment;
 LinearLayout layoutPreapproval;

 // You will need at least one CheckoutButton, this application has four for examples
 CheckoutButton launchSimplePayment;
 CheckoutButton launchParallelPayment;
 CheckoutButton launchChainedPayment;
 CheckoutButton launchPreapproval;

 // These are used to display the results of the transaction
 public static String resultTitle;
 public static String resultInfo;
 public static String resultExtra;

 // This handler will allow us to properly update the UI. You cannot touch Views from a non-UI thread.
 Handler hRefresh = new Handler(){
  @Override
  public void handleMessage(Message msg) {
   switch(msg.what){
       case INITIALIZE_SUCCESS:
        setupButtons();
              break;
       case INITIALIZE_FAILURE:
        showFailure();
        break;
   }
  }
 };


 public void onCreate(Bundle savedInstanceState) {
  super.onCreate(savedInstanceState);

  // Initialize the library. We'll do it in a separate thread because it requires communication with the server
  // which may take some time depending on the connection strength/speed.
  Thread libraryInitializationThread = new Thread() {
   public void run() {
    initLibrary();

    // The library is initialized so let's create our CheckoutButton and update the UI.
    if (PayPal.getInstance().isLibraryInitialized()) {
     hRefresh.sendEmptyMessage(INITIALIZE_SUCCESS);
    }
    else {
     hRefresh.sendEmptyMessage(INITIALIZE_FAILURE);
    }
   }
  };
  libraryInitializationThread.start();

  // Setup our UI.
  scroller = new ScrollView(this);
  scroller.setLayoutParams(new LayoutParams(LayoutParams.FILL_PARENT, LayoutParams.FILL_PARENT));
  scroller.setBackgroundColor(Color.BLACK);

  LinearLayout content = new LinearLayout(this);
  content.setLayoutParams(new LayoutParams(LayoutParams.FILL_PARENT, LayoutParams.FILL_PARENT));
  content.setGravity(Gravity.CENTER_HORIZONTAL);
  content.setOrientation(LinearLayout.VERTICAL);
  content.setPadding(10, 10, 10, 10);
  content.setBackgroundColor(Color.TRANSPARENT);

  layoutSimplePayment = new LinearLayout(this);
  layoutSimplePayment.setLayoutParams(new LayoutParams(LayoutParams.WRAP_CONTENT, LayoutParams.WRAP_CONTENT));
  layoutSimplePayment.setGravity(Gravity.CENTER_HORIZONTAL);
  layoutSimplePayment.setOrientation(LinearLayout.VERTICAL);
  layoutSimplePayment.setPadding(0, 5, 0, 5);

  labelSimplePayment = new TextView(this);
  labelSimplePayment.setGravity(Gravity.CENTER_HORIZONTAL);
  labelSimplePayment.setText("Simple Payment:");
  layoutSimplePayment.addView(labelSimplePayment);
  labelSimplePayment.setVisibility(View.GONE);

  content.addView(layoutSimplePayment);

  layoutSplitPayment = new LinearLayout(this);
  layoutSplitPayment.setLayoutParams(new LayoutParams(LayoutParams.WRAP_CONTENT, LayoutParams.WRAP_CONTENT));
  layoutSplitPayment.setGravity(Gravity.CENTER_HORIZONTAL);
  layoutSplitPayment.setOrientation(LinearLayout.VERTICAL);
  layoutSplitPayment.setPadding(0, 5, 0, 5);

  labelParallelPayment = new TextView(this);
  labelParallelPayment.setGravity(Gravity.CENTER_HORIZONTAL);
  labelParallelPayment.setText("Parallel Payment:");
  layoutSplitPayment.addView(labelParallelPayment);
  labelParallelPayment.setVisibility(View.GONE);

  content.addView(layoutSplitPayment);

  layoutChainedPayment = new LinearLayout(this);
  layoutChainedPayment.setLayoutParams(new LayoutParams(LayoutParams.WRAP_CONTENT, LayoutParams.WRAP_CONTENT));
  layoutChainedPayment.setGravity(Gravity.CENTER_HORIZONTAL);
  layoutChainedPayment.setOrientation(LinearLayout.VERTICAL);
  layoutChainedPayment.setPadding(0, 5, 0, 5);

  labelChainedPayment = new TextView(this);
  labelChainedPayment.setGravity(Gravity.CENTER_HORIZONTAL);
  labelChainedPayment.setText("Chained Payment:");
  layoutChainedPayment.addView(labelChainedPayment);
  labelChainedPayment.setVisibility(View.GONE);

  content.addView(layoutChainedPayment);

  layoutPreapproval = new LinearLayout(this);
  layoutPreapproval.setLayoutParams(new LayoutParams(LayoutParams.WRAP_CONTENT, LayoutParams.WRAP_CONTENT));
  layoutPreapproval.setGravity(Gravity.CENTER_HORIZONTAL);
  layoutPreapproval.setOrientation(LinearLayout.VERTICAL);
  layoutPreapproval.setPadding(0, 5, 0, 1);

  labelPreapproval = new TextView(this);
  labelPreapproval.setGravity(Gravity.CENTER_HORIZONTAL);
  labelPreapproval.setText("Preapproval:");
  layoutPreapproval.addView(labelPreapproval);
  labelPreapproval.setVisibility(View.GONE);

  content.addView(layoutPreapproval);

  LinearLayout layoutKey = new LinearLayout(this);
  layoutKey.setLayoutParams(new LayoutParams(LayoutParams.WRAP_CONTENT, LayoutParams.WRAP_CONTENT));
  layoutKey.setGravity(Gravity.CENTER_HORIZONTAL);
  layoutKey.setOrientation(LinearLayout.VERTICAL);
  layoutKey.setPadding(0, 1, 0, 5);

  enterPreapprovalKey = new EditText(this);
  enterPreapprovalKey.setLayoutParams(new LayoutParams(200, 45));
  enterPreapprovalKey.setGravity(Gravity.CENTER);
  enterPreapprovalKey.setSingleLine(true);
  enterPreapprovalKey.setHint("Enter PA Key");
  layoutKey.addView(enterPreapprovalKey);
  enterPreapprovalKey.setVisibility(View.GONE);
  labelKey = new TextView(this);
  labelKey.setGravity(Gravity.CENTER_HORIZONTAL);
  labelKey.setPadding(0, -5, 0, 0);
  labelKey.setText("(Required for Preapproval)");
  layoutKey.addView(labelKey);
  labelKey.setVisibility(View.GONE);
  content.addView(layoutKey);

  title = new TextView(this);
  title.setLayoutParams(new LinearLayout.LayoutParams(LayoutParams.FILL_PARENT, LayoutParams.WRAP_CONTENT));
  title.setPadding(0, 5, 0, 5);
  title.setGravity(Gravity.CENTER_HORIZONTAL);
  title.setTextSize(30.0f);
  title.setVisibility(TextView.GONE);
  content.addView(title);

  info = new TextView(this);
  info.setLayoutParams(new LinearLayout.LayoutParams(LayoutParams.FILL_PARENT, LayoutParams.WRAP_CONTENT));
  info.setPadding(0, 5, 0, 5);
  info.setGravity(Gravity.CENTER_HORIZONTAL);
  info.setTextSize(20.0f);
  info.setVisibility(TextView.VISIBLE);
  info.setText("Initializing Library...");
  content.addView(info);

  extra = new TextView(this);
  extra.setLayoutParams(new LinearLayout.LayoutParams(LayoutParams.FILL_PARENT, LayoutParams.WRAP_CONTENT));
  extra.setPadding(0, 5, 0, 5);
  extra.setGravity(Gravity.CENTER_HORIZONTAL);
  extra.setTextSize(12.0f);
  extra.setVisibility(TextView.GONE);
  content.addView(extra);

  LinearLayout layoutExit = new LinearLayout(this);
  layoutExit.setLayoutParams(new LayoutParams(LayoutParams.WRAP_CONTENT, LayoutParams.WRAP_CONTENT));
  layoutExit.setGravity(Gravity.CENTER_HORIZONTAL);
  layoutExit.setOrientation(LinearLayout.VERTICAL);
  layoutExit.setPadding(0, 15, 0, 5);

  exitApp = new Button(this);
  exitApp.setLayoutParams(new LayoutParams(200, LayoutParams.WRAP_CONTENT)); //Semi mimic PP button sizes
  exitApp.setOnClickListener(this);
  exitApp.setText("Exit");
  layoutExit.addView(exitApp);
  content.addView(layoutExit);

  appVersion = new TextView(this);
  appVersion.setGravity(Gravity.CENTER_HORIZONTAL);
  appVersion.setPadding(0, -5, 0, 0);
  appVersion.setText("\n\nSimple Demo Build " + build + "\nMPL Library Build " + PayPal.getBuild());
  content.addView(appVersion);
  appVersion.setVisibility(View.GONE);

  scroller.addView(content);
  setContentView(scroller);
 }

 /**
  * Create our CheckoutButton and update the UI.
  */
 public void setupButtons() {
  PayPal pp = PayPal.getInstance();
  // Get the CheckoutButton. There are five different sizes. The text on the button can either be of type TEXT_PAY or TEXT_DONATE.
  launchSimplePayment = pp.getCheckoutButton(this, PayPal.BUTTON_194x37, CheckoutButton.TEXT_PAY);
  // You'll need to have an OnClickListener for the CheckoutButton. For this application, MPL_Example implements OnClickListener and we
  // have the onClick() method below.
  launchSimplePayment.setOnClickListener(this);
  // The CheckoutButton is an android LinearLayout so we can add it to our display like any other View.
  layoutSimplePayment.addView(launchSimplePayment);

  // Get the CheckoutButton. There are five different sizes. The text on the button can either be of type TEXT_PAY or TEXT_DONATE.
  launchParallelPayment = pp.getCheckoutButton(this, PayPal.BUTTON_194x37, CheckoutButton.TEXT_PAY);
  // You'll need to have an OnClickListener for the CheckoutButton. For this application, MPL_Example implements OnClickListener and we
  // have the onClick() method below.
  launchParallelPayment.setOnClickListener(this);
  // The CheckoutButton is an android LinearLayout so we can add it to our display like any other View.
  layoutSplitPayment.addView(launchParallelPayment);

  // Get the CheckoutButton. There are five different sizes. The text on the button can either be of type TEXT_PAY or TEXT_DONATE.
  launchChainedPayment = pp.getCheckoutButton(this, PayPal.BUTTON_194x37, CheckoutButton.TEXT_PAY);
  // You'll need to have an OnClickListener for the CheckoutButton. For this application, MPL_Example implements OnClickListener and we
  // have the onClick() method below.
  launchChainedPayment.setOnClickListener(this);
  // The CheckoutButton is an android LinearLayout so we can add it to our display like any other View.
  layoutChainedPayment.addView(launchChainedPayment);

  // Get the CheckoutButton. There are five different sizes. The text on the button can either be of type TEXT_PAY or TEXT_DONATE.
  launchPreapproval = pp.getCheckoutButton(this, PayPal.BUTTON_194x37, CheckoutButton.TEXT_PAY);
  // You'll need to have an OnClickListener for the CheckoutButton. For this application, MPL_Example implements OnClickListener and we
  // have the onClick() method below.
  launchPreapproval.setOnClickListener(this);
  // The CheckoutButton is an android LinearLayout so we can add it to our display like any other View.
  layoutPreapproval.addView(launchPreapproval);

  // Show our labels and the preapproval EditText.
  labelSimplePayment.setVisibility(View.VISIBLE);
  labelParallelPayment.setVisibility(View.VISIBLE);
  labelChainedPayment.setVisibility(View.VISIBLE);
  labelPreapproval.setVisibility(View.VISIBLE);
  enterPreapprovalKey.setVisibility(View.VISIBLE);
  labelKey.setVisibility(View.VISIBLE);
  appVersion.setVisibility(View.VISIBLE);

  info.setText("");
  info.setVisibility(View.GONE);
 }

 /**
  * Show a failure message because initialization failed.
  */
 public void showFailure() {
  title.setText("FAILURE");
  info.setText("Could not initialize the PayPal library.");
  title.setVisibility(View.VISIBLE);
  info.setVisibility(View.VISIBLE);
 }

 /**
  * The initLibrary function takes care of all the basic Library initialization.
  *
  * @return The return will be true if the initialization was successful and false if
  */
 private void initLibrary() {
  PayPal pp = PayPal.getInstance();
  // If the library is already initialized, then we don't need to initialize it again.
  if(pp == null) {
   // This is the main initialization call that takes in your Context, the Application ID, and the server you would like to connect to.
   pp = PayPal.initWithAppID(this, appID, server);

   // -- These are required settings.
         pp.setLanguage("en_US"); // Sets the language for the library.
         // --

         // -- These are a few of the optional settings.
         // Sets the fees payer. If there are fees for the transaction, this person will pay for them. Possible values are FEEPAYER_SENDER,
         // FEEPAYER_PRIMARYRECEIVER, FEEPAYER_EACHRECEIVER, and FEEPAYER_SECONDARYONLY.
         pp.setFeesPayer(PayPal.FEEPAYER_EACHRECEIVER);
         // Set to true if the transaction will require shipping.
         pp.setShippingEnabled(true);
         // Dynamic Amount Calculation allows you to set tax and shipping amounts based on the user's shipping address. Shipping must be
         // enabled for Dynamic Amount Calculation. This also requires you to create a class that implements PaymentAdjuster and Serializable.
         pp.setDynamicAmountCalculationEnabled(false);
         // --
  }
 }

 /**
  * Create a PayPalPayment which is used for simple payments.
  *
  * @return Returns a PayPalPayment.
  */
 private PayPalPayment exampleSimplePayment() {
  // Create a basic PayPalPayment.
  PayPalPayment payment = new PayPalPayment();
  // Sets the currency type for this payment.
     payment.setCurrencyType("USD");
     // Sets the recipient for the payment. This can also be a phone number.
     payment.setRecipient("example-merchant-1@paypal.com");
     // Sets the amount of the payment, not including tax and shipping amounts.
     payment.setSubtotal(new BigDecimal("8.25"));
     // Sets the payment type. This can be PAYMENT_TYPE_GOODS, PAYMENT_TYPE_SERVICE, PAYMENT_TYPE_PERSONAL, or PAYMENT_TYPE_NONE.
     payment.setPaymentType(PayPal.PAYMENT_TYPE_GOODS);

     // PayPalInvoiceData can contain tax and shipping amounts. It also contains an ArrayList of PayPalInvoiceItem which can
     // be filled out. These are not required for any transaction.
     PayPalInvoiceData invoice = new PayPalInvoiceData();
     // Sets the tax amount.
     invoice.setTax(new BigDecimal("1.25"));
     // Sets the shipping amount.
     invoice.setShipping(new BigDecimal("4.50"));

     // PayPalInvoiceItem has several parameters available to it. None of these parameters is required.
     PayPalInvoiceItem item1 = new PayPalInvoiceItem();
     // Sets the name of the item.
     item1.setName("Pink Stuffed Bunny");
     // Sets the ID. This is any ID that you would like to have associated with the item.
     item1.setID("87239");
     // Sets the total price which should be (quantity * unit price). The total prices of all PayPalInvoiceItem should add up
     // to less than or equal the subtotal of the payment.
     item1.setTotalPrice(new BigDecimal("6.00"));
     // Sets the unit price.
     item1.setUnitPrice(new BigDecimal("2.00"));
     // Sets the quantity.
     item1.setQuantity(3);
     // Add the PayPalInvoiceItem to the PayPalInvoiceData. Alternatively, you can create an ArrayList
     // and pass it to the PayPalInvoiceData function setInvoiceItems().
     invoice.getInvoiceItems().add(item1);

     // Create and add another PayPalInvoiceItem to add to the PayPalInvoiceData.
     PayPalInvoiceItem item2 = new PayPalInvoiceItem();
     item2.setName("Well Wishes");
     item2.setID("56691");
     item2.setTotalPrice(new BigDecimal("2.25"));
     item2.setUnitPrice(new BigDecimal("0.25"));
     item2.setQuantity(9);
     invoice.getInvoiceItems().add(item2);

     // Sets the PayPalPayment invoice data.
     payment.setInvoiceData(invoice);
     // Sets the merchant name. This is the name of your Application or Company.
     payment.setMerchantName("The Gift Store");
     // Sets the description of the payment.
     payment.setDescription("Quite a simple payment");
     // Sets the Custom ID. This is any ID that you would like to have associated with the payment.
     payment.setCustomID("8873482296");
     // Sets the Instant Payment Notification url. This url will be hit by the PayPal server upon completion of the payment.
     payment.setIpnUrl("http://www.exampleapp.com/ipn");
     // Sets the memo. This memo will be part of the notification sent by PayPal to the necessary parties.
     payment.setMemo("Hi! I'm making a memo for a simple payment.");

     return payment;
 }

 /**
  * Create a PayPalAdvancedPayment is setup to be a parallel payment.
  *
  * @return Returns a PayPalAdvancedPayment.
  */
 private PayPalAdvancedPayment exampleParallelPayment() {
  // Create the PayPalAdvancedPayment.
  PayPalAdvancedPayment payment = new PayPalAdvancedPayment();
  // Sets the currency type for this payment.
     payment.setCurrencyType("USD");
     // Sets the Instant Payment Notification url. This url will be hit by the PayPal server upon completion of the payment.
     payment.setIpnUrl("http://www.exampleapp.com/ipn");
     // Sets the memo. This memo will be part of the notification sent by PayPal to the necessary parties.
     payment.setMemo("This sure is a swell memo for a parallel payment.");

     // Create the PayPalReceiverDetails. You must have at least one of these to make an advanced payment and you should have
     // more than one for a Parallel or Chained payment.
  PayPalReceiverDetails receiver1 = new PayPalReceiverDetails();
  // Sets the recipient for the PayPalReceiverDetails. This can also be a phone number.
  receiver1.setRecipient("example-merchant-2@paypal.com");
  // Sets the subtotal of the payment for this receiver, not including tax and shipping amounts.
  receiver1.setSubtotal(new BigDecimal("13.50"));
  // Sets the primary flag for this receiver. This is defaulted to false. No receiver can be a primary for a parallel payment.
  receiver1.setIsPrimary(false);
  // Sets the payment type. This can be PAYMENT_TYPE_GOODS, PAYMENT_TYPE_SERVICE, PAYMENT_TYPE_PERSONAL, or PAYMENT_TYPE_NONE.
  receiver1.setPaymentType(PayPal.PAYMENT_TYPE_GOODS);

  // PayPalInvoiceData can contain tax and shipping amounts. It also contains an ArrayList of PayPalInvoiceItem which can
     // be filled out. These are not required for any transaction.
  PayPalInvoiceData invoice1 = new PayPalInvoiceData();
  // Sets the tax amount.
  invoice1.setTax(new BigDecimal("2.20"));
  // Sets the shipping amount.
  invoice1.setShipping(BigDecimal.ZERO);

  // PayPalInvoiceItem has several parameters available to it. None of these parameters is required.
  PayPalInvoiceItem item1 = new PayPalInvoiceItem();
  // Sets the name of the item.
     item1.setName("Laser Show");(1) create account in sandbox environment:
     // Sets the ID. This is any ID that you would like to have associated with the item.
     item1.setID("4211");
     // Sets the total price which should be (quantity * unit price). The total prices of all PayPalInvoiceItem should add up
     // to less than or equal the subtotal of the payment.
     item1.setTotalPrice(new BigDecimal("7.30"));
     // Sets the unit price.
     item1.setUnitPrice(new BigDecimal("7.30"));
     // Sets the quantity.
     item1.setQuantity(1);
     // Add the PayPalInvoiceItem to the PayPalInvoiceData. Alternatively, you can create an ArrayList
     // and pass it to the PayPalInvoiceData function setInvoiceItems().
     invoice1.getInvoiceItems().add(item1);

     // Create and add another PayPalInvoiceItem to add to the PayPalInvoiceData.
  PayPalInvoiceItem item2 = new PayPalInvoiceItem();
     item2.setName("Fog Machine");
     item2.setID("6325");
     item2.setTotalPrice(new BigDecimal("4.80"));
     item2.setUnitPrice(new BigDecimal("1.20"));
     item2.setQuantity(4);
     invoice1.getInvoiceItems().add(item2);

     // Create and add another PayPalInvoiceItem to add to the PayPalInvoiceData.
  PayPalInvoiceItem item3 = new PayPalInvoiceItem();
     item3.setName("Fog Liquid");
     item3.setID("2196");
     item3.setTotalPrice(new BigDecimal("1.40"));
     item3.setUnitPrice(new BigDecimal("0.20"));
     item3.setQuantity(7);
     invoice1.getInvoiceItems().add(item3);

     // Sets the PayPalReceiverDetails invoice data.
     receiver1.setInvoiceData(invoice1);
     // Sets the merchant name. This is the name of your Application or Company.
     receiver1.setMerchantName("Laser Shop");
     // Sets the description of the payment.
     receiver1.setDescription("The first of two party guys");
     // Sets the Custom ID. This is any ID that you would like to have associated with the PayPalReceiverDetails.
     receiver1.setCustomID("001813");
     // Add the receiver to the payment. Alternatively, you can create an ArrayList
     // and pass it to the PayPalAdvancedPayment function setReceivers().
  payment.getReceivers().add(receiver1);

     // Create another receiver for the parallel payment
  PayPalReceiverDetails receiver2 = new PayPalReceiverDetails();
  receiver2.setRecipient("example-merchant-3@paypal.com");
  receiver2.setSubtotal(new BigDecimal("16.00"));
  receiver2.setIsPrimary(false);
  receiver2.setPaymentType(PayPal.PAYMENT_TYPE_GOODS);

  // PayPalInvoiceData can contain tax and shipping amounts. It also contains an ArrayList of PayPalInvoiceItem which can
     // be filled out. These are not required for any transaction.
  PayPalInvoiceData invoice2 = new PayPalInvoiceData();
  // Sets the tax amount.
  invoice2.setTax(new BigDecimal("3.40"));
  // Sets the shipping amount.
  invoice2.setShipping(new BigDecimal("5.15"));

  // PayPalInvoiceItem has several parameters available to it. None of these parameters is required.
  PayPalInvoiceItem item4 = new PayPalInvoiceItem();
  // Sets the name of the item.
     item4.setName("Beverages");
     // Sets the ID. This is any ID that you would like to have associated with the item.
     item4.setID("7254");
     // Sets the total price which should be (quantity * unit price). The total prices of all PayPalInvoiceItem should add up
     // to less than or equal the subtotal of the payment.
     item4.setTotalPrice(new BigDecimal("11.00"));
     // Sets the unit price.
     item4.setUnitPrice(new BigDecimal("1.00"));
     // Sets the quantity.
     item4.setQuantity(11);
     // Add the PayPalInvoiceItem to the PayPalInvoiceData. Alternatively, you can create an ArrayList
     // and pass it to the PayPalInvoiceData function setInvoiceItems().
     invoice2.getInvoiceItems().add(item4);

     // Create and add another PayPalInvoiceItem to add to the PayPalInvoiceData.
  PayPalInvoiceItem item5 = new PayPalInvoiceItem();
     item5.setName("Refreshments");
     item5.setID("1288");
     item5.setTotalPrice(new BigDecimal("5.00"));
     item5.setUnitPrice(new BigDecimal("1.25"));
     item5.setQuantity(4);
     invoice2.getInvoiceItems().add(item5);

     // Sets the PayPalReceiverDetails invoice data.
     receiver2.setInvoiceData(invoice2);
     // Sets the merchant name. This is the name of your Application or Company.
     receiver2.setMerchantName("Drinks & Refreshments");
     // Sets the description of the payment.
     receiver2.setDescription("The second of two party guys");
     // Sets the Custom ID. This is any ID that you would like to have associated with the PayPalReceiverDetails.
     receiver2.setCustomID("001768");
  payment.getReceivers().add(receiver2);

  return payment;
 }

 /**
  * Creates a PayPalAdvancedPayment which is setup to be a chained payment.
  *
  * @return Returns a PayPalAdvancedPayment.
  */
 private PayPalAdvancedPayment exampleChainedPayment() {
  // Create the PayPalAdvancedPayment.
  PayPalAdvancedPayment payment = new PayPalAdvancedPayment();
  // Sets the currency type for this payment.
     payment.setCurrencyType("USD");
     // Sets the Instant Payment Notification url. This url will be hit by the PayPal server upon completion of the payment.
     payment.setIpnUrl("http://www.exampleapp.com/ipn");
     // Sets the memo. This memo will be part of the notification sent by PayPal to the necessary parties.
     payment.setMemo("Yarr, a memo for chained payments, this be.");

     // Create the PayPalReceiverDetails. You must have at least one of these to make an advanced payment and you should have
     // more than one for a Parallel or Chained payment.
  PayPalReceiverDetails receiver1 = new PayPalReceiverDetails();
  // Sets the recipient for the PayPalReceiverDetails. This can also be a phone number.
  receiver1.setRecipient("example-merchant-1@paypal.com");
  // Sets the subtotal of the payment for this receiver, not including tax and shipping amounts.
  receiver1.setSubtotal(new BigDecimal("15.00"));
  // Sets the primary flag for the receiver. One receiver must be a primary to create a Chained payment.
  receiver1.setIsPrimary(true);
  // Sets the payment type. This can be PAYMENT_TYPE_GOODS, PAYMENT_TYPE_SERVICE, PAYMENT_TYPE_PERSONAL, or PAYMENT_TYPE_NONE.
  receiver1.setPaymentType(PayPal.PAYMENT_TYPE_GOODS);

  // PayPalInvoiceData can contain tax and shipping amounts. It also contains an ArrayList of PayPalInvoiceItem which can
     // be filled out. These are not required for any transaction.
  PayPalInvoiceData invoice1 = new PayPalInvoiceData();
  // Sets the tax amount.
  invoice1.setTax(new BigDecimal("1.50"));
  // Sets the shipping amount.
  invoice1.setShipping(new BigDecimal("3.50"));

  // PayPalInvoiceItem has several parameters available to it. None of these parameters is required.
  PayPalInvoiceItem item1 = new PayPalInvoiceItem();
  // Sets the name of the item.
     item1.setName("Boat Tickets");
     // Sets the ID. This is any ID that you would like to have associated with the item.
     item1.setID("29463");
     // Sets the total price which should be (quantity * unit price). The total prices of all PayPalInvoiceItem should add up
     // to less than or equal the subtotal of the payment.
     item1.setTotalPrice(new BigDecimal("15.00"));
     // Sets the unit price.
     item1.setUnitPrice(new BigDecimal("3.00"));
     // Sets the quantity.
     item1.setQuantity(5);
     // Add the PayPalInvoiceItem to the PayPalInvoiceData. Alternatively, you can create an ArrayList
     // and pass it to the PayPalInvoiceData function setInvoiceItems().
     invoice1.getInvoiceItems().add(item1);

     // Sets the PayPalReceiverDetails invoice data.
     receiver1.setInvoiceData(invoice1);
     // Sets the merchant name. This is the name of your Application or Company.
     receiver1.setMerchantName("Boating Inc.");
     // Sets the description of the payment.
     receiver1.setDescription("A chain payment primary");
     // Sets the Custom ID. This is any ID that you would like to have associated with the PayPalReceiverDetails.
     receiver1.setCustomID("55342");
     // Add the receiver to the payment. Alternatively, you can create an ArrayList
     // and pass it to the PayPalAdvancedPayment function setReceivers().
  payment.getReceivers().add(receiver1);

  // Create another receiver for the chained payment
  PayPalReceiverDetails receiver2 = new PayPalReceiverDetails();
  receiver2.setRecipient("example-merchant-2@paypal.com");
  receiver2.setSubtotal(new BigDecimal("6.00"));
  receiver2.setIsPrimary(false);
  receiver2.setPaymentType(PayPal.PAYMENT_TYPE_GOODS);
  receiver2.setMerchantName("Ticket Source Junior");
  receiver2.setDescription("One of the chain payment secondaries");
     receiver2.setCustomID("93675");
  payment.getReceivers().add(receiver2);

  // Create another receiver for the chained payment
  PayPalReceiverDetails receiver3 = new PayPalReceiverDetails();
  receiver3.setRecipient("example-merchant-3@paypal.com");
  receiver3.setSubtotal(new BigDecimal("7.00"));
  receiver3.setIsPrimary(false);
  receiver3.setPaymentType(PayPal.PAYMENT_TYPE_GOODS);
  receiver3.setMerchantName("Ticket Source Senior");
  receiver3.setDescription("One of the chain payment secondaries");
     receiver3.setCustomID("78853");
  payment.getReceivers().add(receiver3);

  return payment;
 }

 /**
  * Creates a PayPalPreapproval.
  *
  * @return Returns a PayPalPreapproval.
  */
 private PayPalPreapproval examplePreapproval() {
  // Create the PayPalPreapproval
     PayPalPreapproval preapproval = new PayPalPreapproval();
     // Sets the currency type for this payment.
     preapproval.setCurrencyType("USD");
     // Sets the Instant Payment Notification url. This url will be hit by the PayPal server upon completion of the payment.
     preapproval.setIpnUrl("http://www.exampleapp.com/ipn");
     // Sets the memo. This memo will be part of the notification sent by PayPal to the necessary parties.
     preapproval.setMemo("Why hello, and welcome to the preapproval memo.");
     // Sets the merchant name. This is the name of your Application or Company.
     preapproval.setMerchantName("Joe's Bear Emporium");

  return preapproval;
 }

 public void onClick(View v) {

  /**
   * For each call to checkout() and preapprove(), we pass in a ResultDelegate. If you want your application
   * to be notified as soon as a payment is completed, then you need to create a delegate for your application.
   * The delegate will need to implement PayPalResultDelegate and Serializable. See our ResultDelegate for
   * more details.
   */

  if(v == launchSimplePayment) {
   // Use our helper function to create the simple payment.
   PayPalPayment payment = exampleSimplePayment();
   // Use checkout to create our Intent.
   Intent checkoutIntent = PayPal.getInstance().checkout(payment, this, new ResultDelegate());
   // Use the android's startActivityForResult() and pass in our Intent. This will start the library.
      startActivityForResult(checkoutIntent, request);
  } else if(v == launchParallelPayment) {
   // Use our helper function to create the parallel payment.
      PayPalAdvancedPayment payment = exampleParallelPayment();
      // Use checkout to create our Intent.
      Intent checkoutIntent = PayPal.getInstance().checkout(payment, this, new ResultDelegate());
      // Use the android's startActivityForResult() and pass in our Intent. This will start the library.
      startActivityForResult(checkoutIntent, request);
  } else if(v == launchChainedPayment) {
   // Use our helper function to create the chained payment.
      PayPalAdvancedPayment payment = exampleChainedPayment();
      // Use checkout to create our Intent.
      Intent checkoutIntent = PayPal.getInstance().checkout(payment, this, new ResultDelegate());
      // Use the android's startActivityForResult() and pass in our Intent. This will start the library.
      startActivityForResult(checkoutIntent, request);
  } else if(v == launchPreapproval) {
   // Use our helper function to create the preapproval.
   PayPalPreapproval preapproval = examplePreapproval();
   // Set our preapproval key. In order to start a preapproval, you will need a preapproval key.  In order to
   // get this key, you will need to make a call externally to the library. Our application uses a simple
   // EditText for the key to be entered into.
   PayPal.getInstance().setPreapprovalKey(enterPreapprovalKey.getText().toString());
   // Use peapprove to create our Intent.
   Intent preapproveIntent = PayPal.getInstance().preapprove(preapproval, this, new ResultDelegate());
   // Use the android's startActivityForResult() and pass in our Intent. This will start the library.
   startActivityForResult(preapproveIntent, request);
  } else if(v == exitApp) {
   // The exit button was pressed, so close the application.
   finish();
  }
 }

 public void onActivityResult(int requestCode, int resultCode, Intent data) {
     if(requestCode != request)
      return;

     /**
      * If you choose not to implement the PayPalResultDelegate, then you will receive the transaction results here.
      * Below is a section of code that is commented out. This is an example of how to get result information for
      * the transaction. The resultCode will tell you how the transaction ended and other information can be pulled
      * from the Intent using getStringExtra.
      */
     /*switch(resultCode) {
  case Activity.RESULT_OK:
   resultTitle = "SUCCESS";
   resultInfo = "You have successfully completed this " + (isPreapproval ? "preapproval." : "payment.");
   //resultExtra = "Transaction ID: " + data.getStringExtra(PayPalActivity.EXTRA_PAY_KEY);
   break;
  case Activity.RESULT_CANCELED:
   resultTitle = "CANCELED";
   resultInfo = "The transaction has been cancelled.";
   resultExtra = "";
   break;
  case PayPalActivity.RESULT_FAILURE:
   resultTitle = "FAILURE";
   resultInfo = data.getStringExtra(PayPalActivity.EXTRA_ERROR_MESSAGE);
   resultExtra = "Error ID: " + data.getStringExtra(PayPalActivity.EXTRA_ERROR_ID);
  }*/


     launchSimplePayment.updateButton();
     launchParallelPayment.updateButton();
     launchChainedPayment.updateButton();
     launchPreapproval.updateButton();

     title.setText(resultTitle);
     title.setVisibility(View.VISIBLE);
     info.setText(resultInfo);
     info.setVisibility(View.VISIBLE);
     extra.setText(resultExtra);
     extra.setVisibility(View.VISIBLE);
    }
}
Now my ResultDelegate class
package com.paypal.android.simpledemo;

import java.io.Serializable;

import com.paypal.android.MEP.PayPalResultDelegate;

public class ResultDelegate implements PayPalResultDelegate, Serializable {

 private static final long serialVersionUID = 10001L;

 /**
  * Notification that the payment has been completed successfully.
  *
  * @param payKey
  *            the pay key for the payment
  * @param paymentStatus
  *            the status of the transaction
  */
 public void onPaymentSucceeded(String payKey, String paymentStatus) {
  SimpleDemo.resultTitle = "SUCCESS";
  SimpleDemo.resultInfo = "You have successfully completed your transaction.";
  SimpleDemo.resultExtra = "Key: " + payKey;
 }

 /**
  * Notification that the payment has failed.
  *
  * @param paymentStatus
  *            the status of the transaction
  * @param correlationID
  *            the correlationID for the transaction failure
  * @param payKey
  *            the pay key for the payment
  * @param errorID
  *            the ID of the error that occurred
  * @param errorMessage
  *            the error message for the error that occurred
  */
 public void onPaymentFailed(String paymentStatus, String correlationID,
   String payKey, String errorID, String errorMessage) {
  SimpleDemo.resultTitle = "FAILURE";
  SimpleDemo.resultInfo = errorMessage;
  SimpleDemo.resultExtra = "Error ID: " + errorID + "\nCorrelation ID: "
    + correlationID + "\nPay Key: " + payKey;
 }

 /**
  * Notification that the payment was canceled.
  *
  * @param paymentStatus
  *            the status of the transaction
  */
 public void onPaymentCanceled(String paymentStatus) {
  SimpleDemo.resultTitle = "CANCELED";
  SimpleDemo.resultInfo = "The transaction has been cancelled.";
  SimpleDemo.resultExtra = "";
 }
}
Happy coding... :)
Enjoy... :)


