. Android Developers Blog

Sunday, 31 March 2013

Roboelectric : AndroidManifest.xml not found or not a file

Hello Friends,

While Running my first android Test Project, I found                                                            
                                                                                                               
the following error:        
                                                                                                                            
java.lang.RuntimeException: java.lang.RuntimeException: D:\workspace\MyProjectTest\.\AndroidManifest.xml not found or not a file; it should point to your project's AndroidManifest.xml
at org.robolectric.RobolectricTestRunner.methodBlock(RobolectricTestRunner.java:95)
at org.junit.runners.BlockJUnit4ClassRunner.runNotIgnored(BlockJUnit4ClassRunner.java:79)
at org.junit.runners.BlockJUnit4ClassRunner.runChild(BlockJUnit4ClassRunner.java:71)
at org.junit.runners.BlockJUnit4ClassRunner.runChild(BlockJUnit4ClassRunner.java:49)
at org.junit.runners.ParentRunner$3.run(ParentRunner.java:193)
at org.junit.runners.ParentRunner$1.schedule(ParentRunner.java:52)
at org.junit.runners.ParentRunner.runChildren(ParentRunner.java:191)
at org.junit.runners.ParentRunner.access$000(ParentRunner.java:42)
at org.junit.runners.ParentRunner$2.evaluate(ParentRunner.java:184)
at org.junit.runners.ParentRunner.run(ParentRunner.java:236)
at org.eclipse.jdt.internal.junit4.runner.JUnit4TestReference.run(JUnit4TestReference.java:50)
at org.eclipse.jdt.internal.junit.runner.TestExecution.run(TestExecution.java:38)
at org.eclipse.jdt.internal.junit.runner.RemoteTestRunner.runTests(RemoteTestRunner.java:467)
at org.eclipse.jdt.internal.junit.runner.RemoteTestRunner.runTests(RemoteTestRunner.java:683)
at org.eclipse.jdt.internal.junit.runner.RemoteTestRunner.run(RemoteTestRunner.java:390)
at org.eclipse.jdt.internal.junit.runner.RemoteTestRunner.main(RemoteTestRunner.java:197)
Caused by: java.lang.RuntimeException: D:\workspace\MyProjectTest\.\AndroidManifest.xml not found or not a file; it should point to your project's AndroidManifest.xml
at org.robolectric.AndroidManifest.validate(AndroidManifest.java:85)
at org.robolectric.AndroidManifest.getResourcePath(AndroidManifest.java:232)
at org.robolectric.RobolectricContext.getSystemResourcePath(RobolectricContext.java:104)
at org.robolectric.RobolectricTestRunner.setupApplicationState(RobolectricTestRunner.java:181)
at org.robolectric.RobolectricTestRunner.internalBeforeTest(RobolectricTestRunner.java:134)
at org.robolectric.RobolectricTestRunner.methodBlock(RobolectricTestRunner.java:92)
... 15 more

After spending several hours I found the fixed. Actually I am doing a silly mistake during configuring
the test environment.Just forgot to add the project reference , due to this my test project could not
find the Androidmanifest.xml file.

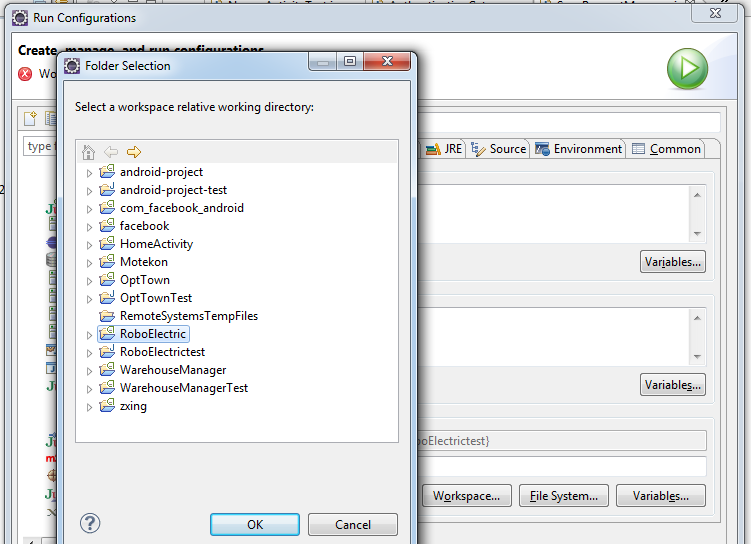
Go to argument tab under junit test run configuration and select the second radio buttoni.e Other and browse and select you android project.

All done now run your project.

Enjoy coding... :)
Cheers :)


Friday, 22 March 2013

Android Unit Testing With Robolectric | Android TDD | Android Unit Test Case

Hello Droid Guys,
           This is my first android Hello World test project using Roboelectric.
This tutoial covers  following testing topic.
                                                                                 

1. How to test text on a TextView using Roboelectric in Android.                          
2. How to test image on a ImageView using Roboelectric in Android
3. How to test New Activity call using Roboelectric in Android
4. Testing Button is visible or not in Android using Roboelectric
5. Test case for button click in android using Roboelectric
5. How to check intent using Roboelectric in Android
6. How to make API call using Roboelectric in Android
7. Calling HTTP request in Android Roboelectric test project

Before starting writing the above listed test case , If you are thinking about how to setup
your First android test project , then see the Robolectric Setup  tutorial .

First of all I am going to create an android Project "RoboElectric" .

Here is my Android Code:

1. MainActivity.java :
package com.example.roboelectric;

import android.os.Bundle;
import android.app.Activity;
import android.content.Intent;
import android.view.Menu;
import android.view.View;
import android.view.View.OnClickListener;
import android.widget.Button;
import android.widget.EditText;

public class MainActivity extends Activity {

 Button login;
 EditText name;
 EditText password;

 @Override
 public void onCreate(Bundle savedInstanceState) {
  super.onCreate(savedInstanceState);
  setContentView(R.layout.activity_main);

  login = (Button) findViewById(R.id.login);
  name = (EditText) findViewById(R.id.name);
  password = (EditText) findViewById(R.id.password);

  login.setOnClickListener(new OnClickListener() {

   @Override
   public void onClick(View v) {
    Intent home = new Intent(MainActivity.this, Home.class);
    startActivity(home);
   }
  });

 }

 @Override
 public boolean onCreateOptionsMenu(Menu menu) {
  // Inflate the menu; this adds items to the action bar if it is present.
  getMenuInflater().inflate(R.menu.activity_main, menu);
  return true;
 }

}
2. Home.java
package com.example.roboelectric;

import android.os.Bundle;
import android.app.Activity;
import android.view.Menu;

public class Home extends Activity {

 @Override
 protected void onCreate(Bundle savedInstanceState) {
  super.onCreate(savedInstanceState);
  setContentView(R.layout.activity_home);
 }

 @Override
 public boolean onCreateOptionsMenu(Menu menu) {
  // Inflate the menu; this adds items to the action bar if it is present.
  getMenuInflater().inflate(R.menu.activity_home, menu);
  return true;
 }

}
3. Second.java
package com.example.roboelectric;

import android.os.Bundle;
import android.app.Activity;
import android.view.Menu;

public class Home extends Activity {

 @Override
 protected void onCreate(Bundle savedInstanceState) {
  super.onCreate(savedInstanceState);
  setContentView(R.layout.activity_home);
 }

 @Override
 public boolean onCreateOptionsMenu(Menu menu) {
  // Inflate the menu; this adds items to the action bar if it is present.
  getMenuInflater().inflate(R.menu.activity_home, menu);
  return true;
 }

}
4. AndroidManifest.xml
<manifest xmlns:android="http://schemas.android.com/apk/res/android"
    package="com.example.roboelectric"
    android:versioncode="1"
    android:versionname="1.0" >

  <uses-sdk
        android:minsdkversion="8"
        android:targetsdkversion="16" >

        <application
            android:allowbackup="true"
            android:icon="@drawable/ic_launcher"
            android:label="@string/app_name"
            android:theme="@style/AppTheme" >

            <activity
                android:name="com.example.roboelectric.MainActivity"
                android:label="@string/app_name" >
                <intent-filter>
                  <action android:name="android.intent.action.MAIN" >
                     <category android:name="android.intent.category.LAUNCHER" >
                     </category>
                   </action>
                </intent-filter>
            </activity>
            <activity
                android:name="com.example.roboelectric.Home"
                android:label="@string/title_activity_home" >
            </activity>
          <activity
                android:name="com.example.roboelectric.Second"
                android:label="@string/title_activity_second" >
            </activity>
        </application>
  </uses-sdk>
</manifest>

What Are the expected test case for above android project ?? 

 1. checking hello world text
 2. login button is visible or not
 3. test startActivity() starts a new activity or not on click of login button '
 Now, I am Going to write my test Project "RoboElectricTest"

1.MyActivityTest.java
import java.io.IOException;

import org.robolectric.Robolectric;
import org.robolectric.RobolectricTestRunner;
import org.robolectric.matchers.StartedMatcher;
import org.junit.Before;
import org.junit.Test;
import org.junit.runner.RunWith;

import android.util.Log;
import android.view.View;
import android.widget.Button;

import com.example.roboelectric.Home;
import com.example.roboelectric.MainActivity;
import com.example.roboelectric.R;
import com.example.roboelectric.Second;

import static org.hamcrest.CoreMatchers.equalTo;
import static org.junit.Assert.assertThat;

@RunWith(RobolectricTestRunner.class)
public class MyActivityTest {

 private MainActivity activity;
 private Button login;
 
 @Before
 public void setUp() throws Exception {
   activity = new MainActivity();
   activity.onCreate(null);
   login = (Button) activity.findViewById(R.id.login);
 }
 
  // checking hello world text
 @Test 
 public void shouldHaveHappySmiles() throws Exception {
  String hello = new MainActivity().getResources().getString( R.string.hello_world);
  assertThat(hello, equalTo("Hello world!"));
 }   
 // Button visible 
 @Test 
 public void testButtonsVisible() { 
  assertThat(login.getVisibility(), equalTo(View.VISIBLE)); 
 } 
 
 // startnew activty 
 @Test 
 public void shouldStartNextActivityWhenButtonIsClicked() { 
  login.performClick();
  assertThat(activity, new StartedMatcher(Home.class));
  }
}


Hope this will helps you ,in writing UI test case for your android project using Roboelectric .

Enjoy Coding. Cheers...... :)

Tuesday, 19 March 2013

Steps to configure RoboElectric with Eclipse | Roboelectric | Test Driven Development


Roboelectric Setup with eclipse: 
                      Hello Droid Guys, have you thinking of  Test Driven Development

in Android  using Roboelectric and Mockito??    
                                                                                                                                                                                                                   
Today , I am going explain some easy steps for configuring the test environment for your android project in eclipse. How to configure Robolectric test framework with eclipse.

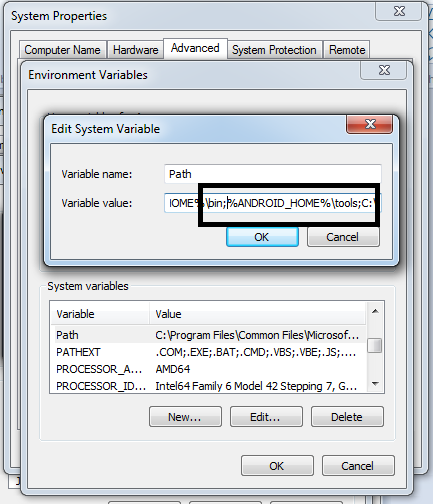
Note: Please add android sdk in your system envoirnment variable path


Step 1: Create an Android Project:
    1. File-->New-->Project-->Android-->Android Project-->Next
    2. New Android Project Dialog will open Name Your porject as
        "RoboElectric"
    3. Package Name "com.example"
    4. Create an Activity Class "MainActivity"
    5.  Click Next and follow Instruction

Step 2: Adding a Source test directory in your android Project
    1. Right click on "RoboElectric" android project in project explorer and create a new
        Folder "test" and click Finish . See below snap for more help:


Step 3: Creating an Java test Project
    1. File-->New-->Java Project
    2. Name the Project as "RoboElectricTest" and click Next


    3. Expand the RoboElectricTest and Seclect "src"
    4. Click  Remove source folder 'src' from build path. See below snap for
         more help


     5. Click on  "Link additional source" and browse to "/Roboelectric/test" and then Click
         Finish. See below snap for help


            Step 4: Adding dependency on the Android Project
               1. Right Click on "RoboelectricTest" Project-->Build Path -->Select Project Tab
               2. Click Add-->select "Roboelectric" project Finish. See below snap:

         
     Step 5: Configuring the build path of "RoboElectricTest" Project:
        1.Go to project build path then select Library tab
        2. Click Add Library-->select Junit--> Next
             Note: Choose Junit 4 because RoboElectric is not Compatible with Junit3
       3. Click Finish.
       4. Click on "Add external Jar and Add roboelectric.jar. You can download it from
            here.
       5.  Click on "Add external Jar and navigate to your android sdk folder and select android.jar
       6.   Click on "Add external Jar and navigate to your android sdk folder and select map.jar


             Step 6: Now the final steps: i.e Creating eclipse Junit run configuration
1                  1. Right Click on "RoboElectric" project go to "Run"-->"Run Configuration"
                    2. Double click on "Junit"  from left menu (Not to click "Android Junit Test")
                    3. Name as RoboElectricTestConfiguration
                    4. Select the "Run all tests in the selected project,package or source folder option
                    5. Click search button
                    6. Select "RoboElectrictest"
                    7. TestRunner: Junit4
                                         
                    Note: Choose Junit 4 because RoboElectric is not Compatible with Junit3
                    8. Select eclipse Junit launcher and click Ok

                                               
                    9. Click the argument Tab from the top
                  10 . Under "Working directory" select the other radio button

                                             
                  11. Click Worksapce, select "RoboElectric"(not the RoboelectricTest and the value inside
                         the "Other" edit box should look like '${workspace_loc:Roboelectric}')

                                      
                  12. Click Ok and close.


                The Roboelectric TDD environment is now configure. Now Android Unit Testing
                Envoirnment With Robolectric will be Done

                In my next blog I will share with you a sample code , which test our first android project
                Hello World , Using Roboelectric.


                Enjoy Coding :)  

                You May ALSO LIKE THIS:
                1. Android TextView testing
                2. Android Button click testing
                3. Android startActivity() or launch new activity test

Tuesday, 12 March 2013

ScrollView in android | horizontal scroll view in android | scroll image horizonatlly and vertically both


Hello friends,

Using the following xml code you can scroll an image in both horizontally and vertically.

<RelativeLayout xmlns:android="http://schemas.android.com/apk/res/android"
    android:layout_width="fill_parent"
    android:layout_height="fill_parent"
    android:background="@color/white"
    android:orientation="vertical" >

       <ScrollView
         android:id="@+id/ScrollView01"
         android:layout_width="wrap_content"
         android:layout_height="320px"
         android:layout_below="@+id/buttonlayout"
         android:scrollbars="horizontal|vertical" >

        <HorizontalScrollView
            android:id="@+id/HorizontalScrollView01"
            android:layout_width="wrap_content"
            android:layout_height="fill_parent" >

            <LinearLayout
                xmlns:android="http://schemas.android.com/apk/res/android"
                android:id="@+id/linearMain3"
                android:layout_width="fill_parent"
                android:layout_height="wrap_content"
                android:orientation="vertical" >

                <ImageView
                    android:id="@+id/imageDetail"
                    android:layout_width="wrap_content"
                    android:layout_height="wrap_content"
                    android:adjustViewBounds="true"
                    android:scaleType="fitXY" />
            </LinearLayout>
        </HorizontalScrollView>
    </ScrollView>
</RelativeLayout>

Thursday, 7 March 2013

Setting working Environment for Android


Hello My Droid Friends,

Set Working environment for Android
To work on android we need to setup working environment. Before setting up android environment we
need to fulfill some basics like
1. JDK must be installed (to install
http://www.oracle.com/technetwork/java/javase/downloads/index.html)
2. Eclipse for java must be installed (http://www.eclipse.org/downloads/)
We are expecting that eclipse is working fine.
1. Download Android SDK
It includes only the core Standard development Kit (SDK) Tools, which will help us in developing Android Applications.
Download Android SDK from http://developer.android.com/sdk/index.html
After downloading .zip or .tgz package (instead of the SDK installer), unpack it to a safe location on your machine.
We will be using it later on in coming steps.
2. Install Android development Tools (ADT)
In Eclipse From Help menu click on Install New Software option


Click on Add button and on Add Site window fill following url to download Android ADT, you can enter any name in Name field, and click on Ok button.


Eclipse will search for the available tools and show their list.


Select all tools and click on Next. It will start checking the things and will show list of tools which will be installed.


Click on Next button and after a license verification it will start downloading and may take some time depending upon the speed of Internet. After successfully installing it will ask to restart eclipse.
Restart it.

3. Adding SDK Location
From Window menu click on Preferences there would be Android option visible (which is also assurance that android ADT is installed :) ). Here we need to tell Eclipse where the Android SDK is located. So click on Android from list, and then browse it to the SDK unzipped directory and click on Ok.


4. Install SDK Latest Version
After that come up on Android SDK and AVD Manager from the Window menu. Select available packages and select the latest version of the SDK, in my case I will select followings, you can select based on your own choice and click on Install Selected to complete the installation, and restart eclipse after it.


During installation It would be looking like this.


5. Set Up Device
As we are almost done, last step is we need to set up device to work, real device can be attached, but we will be using simulator for the scope of our work. From eclipse interface click on this icon from top left side of IDE.
               
                                                                                                   
Select the option Virtual Devices and click on New.
On Android Virtual Device screen fill the followings and click on Create AVD.


It will show the device added in Android SDK and AVD manager screen


Now our setup is complete and we are ready to develop android applications.


Enjoy Coding :)
Cheers...... :)

You may also like this link:
1. Roboelectric test case Integration in Android

Wednesday, 27 February 2013

Sunday, 17 February 2013

Android Dropbox Integration

Hello Droid Guys,

Today, I am going to provide you a full tutorial of dropbox integration into your
android application with source code. Using this you can easily :
            1. upload your image in your dropbox.
            2. upload your text file and document  into your dropbox.
            3. upload your audio and video file into  your dropbox.

Also , List or fetch all your dropbox file, folder and images by your android application.

Step 1: Create an app and get the API KEY and SECRET KEY:
          a) Open this link https://www.dropbox.com/developers and logged in with your
              dropbox credential.

dropbox sync


android dropbox sample


 b) After Logged in , the next page ask you for create an app

android dropbox sample

C) Insert the app name and description and provide the access as full dropbox by 
selecting the second option.
dropbox integration


d) Note your app key and secret key
dropbox integration

                                            
Step 2) Download the android  Sdk for dropbox form HERE

dropbox integration

Now all Done , import the project into your android eclipse and please remember to 
change secret key and App key with your own key.


Hope this will helps you.
Enjoy Coding :)


Saturday, 16 February 2013

android.os.NetworkOnMainThreadException in android

Hello Droid Guys,

Yesterday , I found a strange issue, my application is running fine on most of
the android devices. But when I run the same application on Samsung S-3, S2,
Samsung Galaxy Duos it will be crashed and give me the error

"android.os.NetworkOnMainThreadException".


Caused by: android.os.NetworkOnMainThreadException
10-30 15:07:35.341: E/AndroidRuntime(732):  at android.os.StrictMode$AndroidBlockGuardPolicy.onNetwork(StrictMode.java:1117)

In my application basically I am showing a alert dialog with an logout button and on click of logout
button I am calling the service. This functionality is not working on above few device
and crashes every time on clickinng the logout button .

After spending a lot of time on it I came to know that on device api version below 9 we 
can call or write  network call in Main UI Thread but above api version 9 it gives error
android.os.NetworkOnMainThreadException. This is happening my  case.

There are Two way to fix this Issue:
    1.Instead of writing network call in Main UI Thread use Async Task.
    2.Add below code into your activity class inside onCreate() method just  after the 

      setContentView(R.layout.activity_main).
      
     if( Build.VERSION.SDK_INT >= 9){
            StrictMode.ThreadPolicy policy = new StrictMode.ThreadPolicy.Builder().permitAll().build();
            StrictMode.setThreadPolicy(policy); 
     }


Hoping , this will helps you.
Enjoy Coding :)
   

Sunday, 20 January 2013

Android animation

Hello Droid Guys,

In my previous article or blog , i had explain how to show shake animation
in android. Now , in this blog I am covering the other animation.
like:
1, left to right animation in android
2. right to left animation in android
3. fade out animation in android
4. zoom in animation in android
5. slide up animation in android
6. slide down animation in andriod

1.res/anim/slideoutleft.xml

<?xml version="1.0" encoding="utf-8"?>

<translate xmlns:android="http://schemas.android.com/apk/res/android"
    android:duration="@integer/fastAnim"
    android:fromXDelta="0"
    android:interpolator="@android:anim/overshoot_interpolator"
    android:toXDelta="-100%p" />

2. res/anim/slideinright.xml

    <?xml version="1.0" encoding="utf-8"?>
    <translate xmlns:android="http://schemas.android.com/apk/res/android"
        android:duration="@integer/fastAnim"
        android:fromXDelta="100%p"
        android:interpolator="@android:anim/overshoot_interpolator"
        android:toXDelta="0" />

3.res/anim/fadeout.xml


<?xml version="1.0" encoding="utf-8"?>
<alpha xmlns:android="http://schemas.android.com/apk/res/android"
    android:duration="@integer/fastAnim"
    android:fromAlpha="1.0"
    android:toAlpha="0.0" />


 Another link
 1. Shake animation in android

Android Shake animation

Hello Droid Friends,

This is my another android blog in which I am going to explain the Animation
effect(shake Animation ) in android. When you fill wrong input then instead of
showing the toast messege you can also shake the view.

shake animation

Steps :
1. Create a project with name "Shake animation" and package name
    "com.mukesh.shakeanimation".
2. add an "anim" folder inside the res folder.see the image below.

android shake animation
 
Source Code:

1. Activity Class:


package com.mukesh.shakeanimation;

import android.app.Activity;
import android.os.Bundle;
import android.view.View;
import android.view.animation.Animation;
import android.view.animation.AnimationUtils;
import android.widget.Toast;

public class MainActivity extends Activity implements View.OnClickListener {

 @Override
 public void onCreate(Bundle savedInstanceState) {
  super.onCreate(savedInstanceState);
  setContentView(R.layout.activity_main);

  View loginButton = findViewById(R.id.login);
  loginButton.setOnClickListener(this);
 }

 public void onClick(View v) {
  Animation shake = AnimationUtils.loadAnimation(this, R.anim.shake);
     findViewById(R.id.pw).startAnimation(shake);
     Toast.makeText(this, "Wrong Password", Toast.LENGTH_SHORT).show();
 }

}


2) activity_main.xml


<LinearLayout xmlns:android="http://schemas.android.com/apk/res/android"

    android:layout_width="fill_parent"

    android:layout_height="fill_parent"

    android:background="@drawable/blue_gradient"

    android:orientation="vertical"

    android:padding="10dip" >


    <TextView

        android:layout_width="fill_parent"

        android:layout_height="wrap_content"

        android:layout_marginBottom="10dip"

        android:text="Please enter your password:"

        android:textColor="@android:color/white"

        android:textStyle="bold" />


    <EditText

        android:id="@+id/pw"

        android:layout_width="fill_parent"

        android:layout_height="wrap_content"

        android:clickable="true"

        android:password="true"

        android:singleLine="true" />


    <Button

        android:id="@+id/login"

        android:layout_width="wrap_content"

        android:layout_height="wrap_content"

        android:background="@drawable/btn_active_pressed"

        android:padding="5dp"

        android:text="Login"

        android:textColor="@android:color/white"

        android:textStyle="bold" />


</LinearLayout>

3. res/anim/shake.xml

<translate xmlns:android="http://schemas.android.com/apk/res/android"
    android:duration="500"
    android:fromXDelta="0"
    android:interpolator="@anim/cycle_7"
    android:toXDelta="10" />

4. res/anim/cycle_7.xml

<cycleInterpolator xmlns:android="http://schemas.android.com/apk/res/android"
    android:cycles="7" />


May this will helps someone.
Enjoy coding  :)


Following link also helps you :
1. left to right animation in android
2. right to left animation in android
3. fade out animation in android
4. zoom in animation in android
5. slide up animation in android
6. slide down animation in andriod


Copyright @ 2013 Android Developers Blog.